
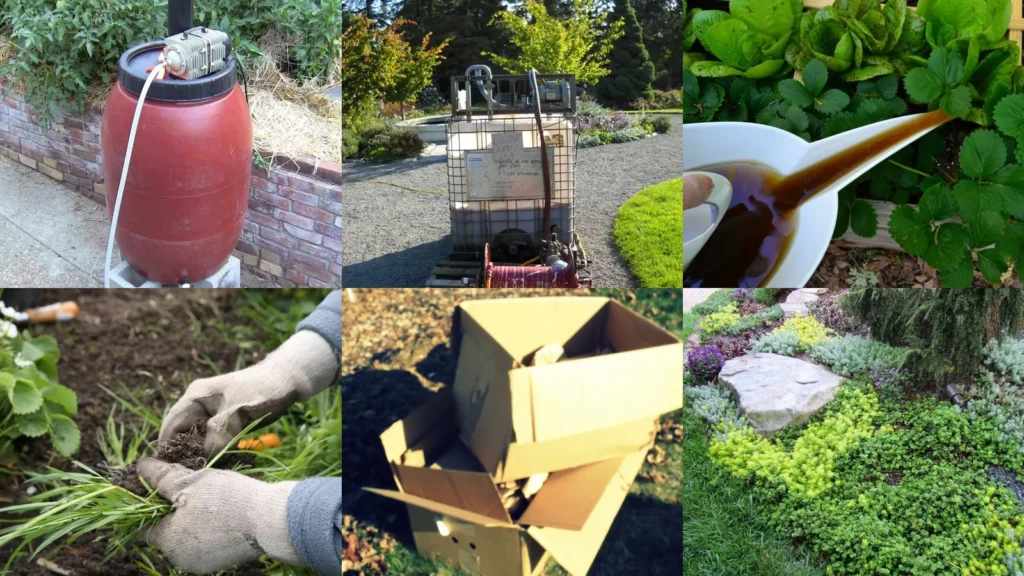

By the end of this list, you’ll have a whole toolkit for feeding your garden without spending a dime on fancy fertilizer. That’s the promise, plain and simple!
Compost tea sounds intimidating if you’ve never made it, but honestly? It’s just steeped compost, kind of like a giant tea bag for your plants, lol!
These ideas came from scrolling through way too many gardening pins and saving only the ones that seemed doable on a random Tuesday. Nothing here needs special equipment or a science degree.
Some of these are strictly about the tea itself. Others cover the things that goes hand in hand with a healthy garden, like keeping weeds down and mulch working for you instead of against you.
Whether you’re brewing your first batch or just trying to figure out what to do with all that cardboard piling up by the recycling bin, there’s something here for you.
Grab a bucket, pick a spot in the yard and let’s get into it!
COMPOST TEA BASICS IDEAS
Simple Compost Tea Brewing Setup

A simple compost tea brewing setup is just a bucket, some finished compost and water. No pump needed, no timer, nothing complicated.
Scoop a few cups of compost into the water and let it sit for a couple of days. Stir it once or twice if you remember, lol!
- The lazy gardener starter kit
- Works with a bucket you already own
- No pump required at all
- Ready in about two days
Compost Tea Bag Method

This method uses an old pillowcase or a mesh bag stuffed with compost, dunked right into a bucket of water like a giant tea bag.
It cuts way down on the mess later since there’s nothing to strain out.
- The no-strain shortcut
- Old pillowcase does the job
- Skip the messy straining step
- Steeps overnight, easy
Five Gallon Bucket Brewer

A five gallon bucket brewer is the workhorse of the whole operation. It’s big enough for a real batch but still easy to lift and pour.
Fill it about a third full of compost, top off with water and let it work its magic for two to three days.
- The five dollar hardware store fix
- One bucket handles a whole garden bed
- Cheap find at the hardware store
- Reusable season after season
Compost Tea Straining Technique

Straining sounds fussy but it really isn’t. Pour the finished tea through an old T-shirt or a fine mesh strainer and you’re done.
This keeps your watering can from clogging up. Nobody wants chunks of leaf mold in there, haha!
- The clog-free pour
- Old T-shirt works great as a filter
- Keeps the watering can clear
- Takes about five minutes
Diluting Compost Tea Properly

Straight compost tea is strong things, so diluting it properly matters more than people think. A general rule is one part tea to ten parts water.
Too strong and it can actually stress out tender plants. Too weak and you’re basically just watering, lol!
- The one to ten rule
- Prevents burning tender roots
- Stretches one batch further
- Easy ratio to remember
Compost Tea For Seedlings

Seedlings need a much gentler touch than mature plants. A weak, well diluted tea gives them a nutrient boost without overwhelming those tiny roots.
Water it in right after the first true leaves show up. That timing makes a noticeable difference in how fast they take off.
- The gentle boost for babies
- Use a lighter dilution than usual
- Best after first true leaves
- Encourages sturdier stems
Aerated Compost Tea System

An aerated compost tea system adds a small aquarium pump to bubble air through the mix while it brews. That oxygen helps beneficial microbes multiply faster.
It’s a step up from the basic bucket method but still totally doable at home. Are you seeing how simple this actually is?
The bubbling also cuts the smell down quite a bit, which is a nice bonus.
- The bubbler upgrade
- Aquarium pump does the heavy lifting
- Brews in twenty four hours
- Less smell than the plain bucket
Compost Tea Application Schedule

A regular application schedule matters just as much as the tea itself. Most gardens do well with a feeding every two to three weeks during the growing season.
Mark it on a calendar or you’ll forget entirely, same as watering the houseplants, haha! Consistency beats a perfect recipe every time.
- The set it and forget it plan
- Every two to three weeks works well
- Pairs nicely with regular watering days
- Skip it during heavy rain weeks
Straw Mulch For Vegetables

Straw mulch is one of the easiest mulching tips beginners can start with, since it’s cheap and forgiving if you spread it a little unevenly.
Lay it about three inches deep around vegetable plants. It keeps soil moisture steady and blocks a lot of weed seeds from ever sprouting.
- The three inch cheat code
- Cheap bale from the farm store
- Keeps soil moisture steady
- Breaks down into the soil over time
Wood Chip Mulch Basics

Wood chips bring a tidier, more permanent look to beds and paths. They last far longer than straw and slowly feed the soil as they break down.
Keep them a few inches away from plant stems though. Piling them right up against the stem invites rot. Nobody wants that.
- The pathway finisher
- Lasts a full season or longer
- Free from many tree services
- Keep it off the plant stems
Landscape Fabric Weed Barrier

Landscape fabric laid under mulch is one of the more reliable weed prevention ideas beds can use, especially in spots that get weedy every single year.
It blocks light from reaching seeds below while still letting water soak through. Cut small X shapes for each plant so roots can breathe.
- The set it once solution
- Blocks light from weed seeds
- Lets water pass through fine
- Cut small slits for each plant
Dense Planting Weed Control

Planting things close together does double duty as ground cover and weed control. Less bare soil means fewer spots for weeds to move in.
Read also: 20+ Genius Chamomile Gardening Hacks That Yield Double
This works especially well in flower beds where you can tuck low growers between taller plants. Who doesn’t love a bed that fills in fast, am I right?
Read also: 17+ Genius Raised Bed Garden Layout Ideas That Maximize Yields
Edging Borders Stop Weeds

A clean edge around your beds does more work than people expect. It physically stops grass and creeping weeds from wandering into your soil.
Read also: 16+ Garden Bed Refresh Ideas Spring That Transform Your Yard
Metal or plastic edging both hold up well. Even a simple trench dug with a shovel makes a noticeable difference within one season.
- The trench that saves weekends
- Metal edging lasts for years
- Stops grass from creeping in
Cardboard Sheet Mulching Layers

Layering cardboard is the backbone of the cardboard method ideas garden folks swear by for smothering grass without digging it all up.
Overlap the sheets so there aren’t any gaps for weeds to sneak through. Top it with compost and mulch.
The grass underneath just gives up over time.
- The lazy grass showstopper
- Overlap sheets so nothing sneaks through
- No digging needed at all
- Breaks down within a few months
Cardboard Under New Beds

Placing cardboard under a brand new bed is a great shortcut if you’re turning a patch of lawn into something else entirely.
It smothers the grass below while the bed above gets built up with soil and compost. No sod removal, no aching back.
- The new bed shortcut
- Skip the sod removal entirely
- Free cardboard from moving boxes
- Bed is ready to plant in weeks
Wetting Cardboard Before Planting
Wetting cardboard before planting sounds like a small detail but it changes everything about how well the sheets break down.
Dry cardboard can actually repel water for a while, which defeats the whole purpose. Soak it thoroughly before laying it down and again right after.
- The soak first trick
- Prevents the cardboard from repelling water
- Speeds up how fast it breaks down
- Takes just a garden hose
Creeping Thyme Groundcover Bed

Creeping thyme is one of the prettiest groundcover instead of mulch ideas out there. It smells amazing when you brush past it.
Read also: 20+ Stunning Mulch Ideas Flower Beds That Transform Yards
It spreads low and thick, crowding out weeds while covering bare soil in tiny purple blooms. Bees absolutely love it too.
- The blooming weed blocker
- Blooms attract bees like crazy
- Smells great when walked on
Clover Lawn Alternative Groundcover

Swapping a patch of lawn for clover is a low maintenance move that a lot of gardeners are trying lately. Honestly? It just makes sense.
Clover stays green through dry spells when regular grass gives up. It also feeds the soil with nitrogen, so nearby plants get a nice bonus.
Read also: 19+ Stunning Rain Garden Ideas That Transform Yards
- The lawn that feeds itself
- Stays green through dry spells
- Feeds nitrogen back into soil
- Rarely needs mowing at all
Sedum Groundcover Garden Border

Last but definitely not least, sedum makes a fantastic border along walkways and garden edges. It’s practically impossible to steal, which is a huge relief.
This one tolerates drought, poor soil and general neglect without complaint. That’s the kind of low effort plant everyone deserves in their yard!
- Tolerates drought without complaint
- Needs almost zero upkeep
Just a little note - some of the links on here may be affiliate links, which means I might earn a small commission if you decide to shop through them (at no extra cost to you!). I only post content which I'm truly enthusiastic about and would suggest to others.
And as you know, I seriously love seeing your takes on the looks and ideas on here - that means the world to me! If you recreate something, please share it here in the comments or feel free to send me a pic. I'm always excited to meet y'all! ✨🤍
Xoxo Camille
Related stories