
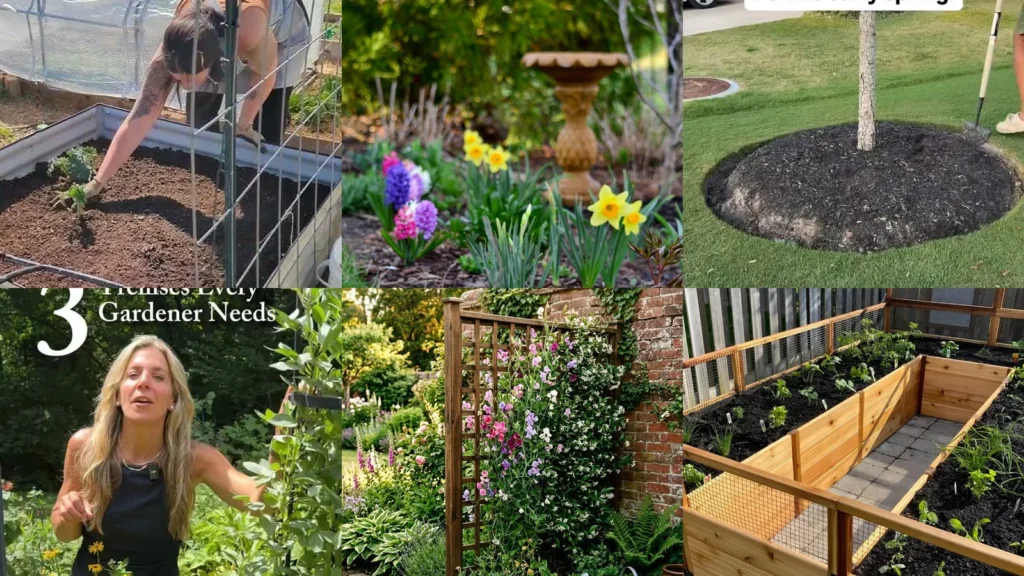

Here’s a tip nobody tells you at the garden center. The best time to fix a tired bed is before anything is actually growing in it yet.
Late winter and early spring are when you can actually see the bones of a bed. No leaves hiding the weeds, no established roots to work around. It’s basically a clean slate!
Read also: 15+ Fall Planting Ideas Garden That Yield Nonstop Harvests
This list pulls together the ideas that actually hold up once the weather warms and everything greens in. Hundreds of pins got scrolled through for this one, lol! Only the ones that looked doable on a everyday weekend made the cut.
Some of these are quick fixes, like fresh mulch or a bulb combo. Others are bigger projects, like building a whole new bed from scratch.
There’s something here whether you have twenty minutes or a whole Saturday.
Budget mattered too. Nobody wants a plan that requires a truckload of fancy soil, right?
A lot of these use what’s already sitting in the yard or the recycling bin.
Grab your gloves and let’s get into it. Your beds are about to look like you hired someone, haha!
GARDEN BED REFRESH IDEAS
Raised Bed Spring Cleanup

Raised beds take a beating over winter. Snow packs down the soil and leaves pile up in corners nobody notices until March.
Pull out anything that rotted over the cold months and loosen the top few inches of soil. This is also the moment to check if the wood frame needs a repair or two before it gets buried under new growth.
- The March fifteen minute fix
- Loosens compacted soil fast
- Costs nothing but time
Colorful Spring Bulb Combinations

Are you guys seeing these bulb combos right now? Tulips and daffodils planted in drifts instead of straight rows look so much more natural.
Read also: 19+ Stunning Tulip Garden Ideas That Bloom Longer
Mix early and late bloomers so the color lasts for weeks instead of days. Grape hyacinth tucked along the edge adds a little purple that most people forget about.
- Weeks of color, one planting
- Blooms stagger themselves
- Squirrels mostly leave daffodils alone
Fresh Mulch Border Refresh

A fresh mulch border is the fastest way to make a whole yard look cared for. It’s honestly a little unfair how much difference two bags can make, lol!
Pull weeds first, then lay mulch about two inches deep. Keep it away from stems so nothing gets smothered.
- The instant curb appeal trick
- Two bags covers a small bed
- Keeps weeds down for months
Vertical Trellis Garden Refresh

Vertical space gets ignored way too often in small beds. A simple trellis against a fence turns flat ground into a whole extra layer of garden.
Sweet peas and clematis climb without much fuss. This one works especially well if the bed itself is narrow, since the growing happens up instead of out.
- Small footprint, big payoff
- Fits a two foot bed
- Climbers do most of the work
Cottage Garden Bed Makeover

Cottage gardens look easy but they actually follow a pattern. Tall flowers in back, medium ones in the middle, low spillers up front along the edge.
Foxglove, lavender and creeping thyme cover all three layers nicely. The whole thing should look a little wild, like it grew that way on purpose.
- Organized chaos, on purpose
- Three height layers
- Thyme fills gaps for free
Spring Planting Layout Plan
A layout plan saves so much wasted money at the nursery. Sketch the bed on paper before buying a single plant.
Group plants by sunlight needs and water needs, not just by color. This one step prevents most of the die-offs people blame on bad luck.
- The plan that saves your wallet
- Prevents overbuying at the nursery
- Groups plants by watering needs
Perennial Bed Revival Ideas

Perennials that looked sad all winter usually aren’t dead, they’re just resting. Cut back last year’s dead growth and most will surprise you within a couple weeks.
Divide anything that’s outgrown its spot and share the extras with a neighbor.
No Dig Bed Layout

No dig gardening skips the tilling entirely and just builds layers on top of the existing ground. It sounds too easy to actually work, but it does. If you were hunting for no dig garden ideas, this one is a keeper!
Plan the layout first so paths stay separate from planting areas. Once it’s set, you never step on the growing soil again, which keeps it loose year after year.
- The lazy method that works
- No tilling required
- Paths stay defined from day one
Cardboard Base No Dig Method

Cardboard is the secret prop of the no dig world. Lay flattened boxes right over grass or weeds and they smother everything underneath.
Read also: 20+ No Dig Gardening Ideas That Double Your Harvest
Remove tape and stickers first or they’ll still be sitting there next spring. Overlap the edges so nothing sneaky pokes through the seams.
- Free weed barrier from the recycling bin
- Uses old delivery boxes
- Breaks down over one season
No Dig Raised Bed Setup

This setup combines a raised frame with the no dig layering underneath. No tilling the ground below, no removing sod by hand.
Just build the frame, line the bottom with cardboard and fill from there. It saves a genuinely surprising amount of backbreaking work.
- Skip the sod removal entirely
- No digging out grass
- Frame keeps soil contained
Sheet Mulching Layer Guide

Sheet mulching stacks organic layers instead of digging anything into the ground. Think of it as building soil from the top down.
If you were hunting for sheet mulching ideas, this one is a keeper!
Start with cardboard, then compost, then mulch on top. The soil improvement tips beginner gardeners actually need usually start right here, layer by boring layer. It genuinely works.
Read also: 19+ Genius Compost Tea Basics Ideas That Boost Garden Growth
- Build soil without a shovel
- Three simple layers
Newspaper And Straw Mulching

Newspaper works just as well as cardboard for a thinner layer. It breaks down faster too, which some people prefer for smaller beds.
Wet the paper down before adding straw on top so it stays put in the wind. This combo is basically the classic version of sheet mulching. It costs almost nothing.
- The classic combo, still works
- Breaks down faster than cardboard
- Straw keeps it from blowing away
Sheet Mulch Weed Barrier

A thick layer stops weeds before they ever see sunlight. It’s less about fighting weeds and more about never letting them start.
Lay it at least four sheets thick for anything stubborn like crabgrass. Give it a full season before expecting a totally clean bed.
- Stops weeds before they start
- Four layers thick for tough spots
- One season for full results
Lasagna Bed Layer Chart

Lasagna gardening got its name from the layering, not the flavor, which trips people up every time, lol! Browns and greens stack the same way compost does, just in place.
A rough chart helps: cardboard, then greens like grass clippings, then browns like dry leaves, repeated a few times. Nobody measures this perfectly and it still turns out fine.
- No math required, promise
- Alternates greens and browns
- Repeats until the bed is full
Leaf And Compost Lasagna Bed

Fall leaves and kitchen compost make an unbeatable lasagna bed combo. Neither one costs a cent if you’re already composting scraps.
This is a great project for the lasagna garden bed ideas crowd who want something ready by early summer. Layer it in autumn and let winter do the breaking down for you.
- Free ingredients from the yard
- Uses fallen leaves
Lasagna Garden Starter Bed

Last but definitely not least, a starter bed is the version to try if this whole method feels intimidating. Keep it small, maybe four feet by four feet, just to test it out.
Once you see how easy it comes together, expanding it next year feels like nothing. Not a bad way to spend an afternoon, haha!
- The tiny test bed
- Four by four feet to start
- Expands easily next season
Just a little note - some of the links on here may be affiliate links, which means I might earn a small commission if you decide to shop through them (at no extra cost to you!). I only post content which I'm truly enthusiastic about and would suggest to others.
And as you know, I seriously love seeing your takes on the looks and ideas on here - that means the world to me! If you recreate something, please share it here in the comments or feel free to send me a pic. I'm always excited to meet y'all! ✨🤍
Xoxo Camille